Our app requires a Jira and Microsoft Entra ID administrator to take action at some point in the setup process. Therefore, we strongly recommend involving both administrators from the start to ensure a seamless implementation of the Jira Assets Importer for Entra ID in your company or team.
Step 1: Install Jira App

Install Assets Importer for Microsoft Azure AD/Entra ID for Jira from the Atlassian Marketplace.
Permission necessary: Jira Admin
Step 2: Configure App
Navigate to the Assets page and select an existing object schema or create a new one to serve as the destination for your Entra ID asset imports.

Once you've chosen or created your schema, proceed to its schema configuration page and locate the 'Import' tab.

On the Import tab, click on 'Create Import' and then select the new import type, 'Entra ID Importer'.


Assign your import a descriptive name that will help you easily recognise it in the future. You can also add an optional description for further context. When you're ready, click 'Create' to continue.
Your importer is now set up and ready to go! The final step is to connect it to your Entra ID. To connect to your Entra ID, locate the three dots in your importer field and click on them. From the dropdown menu, select 'Configure app'.

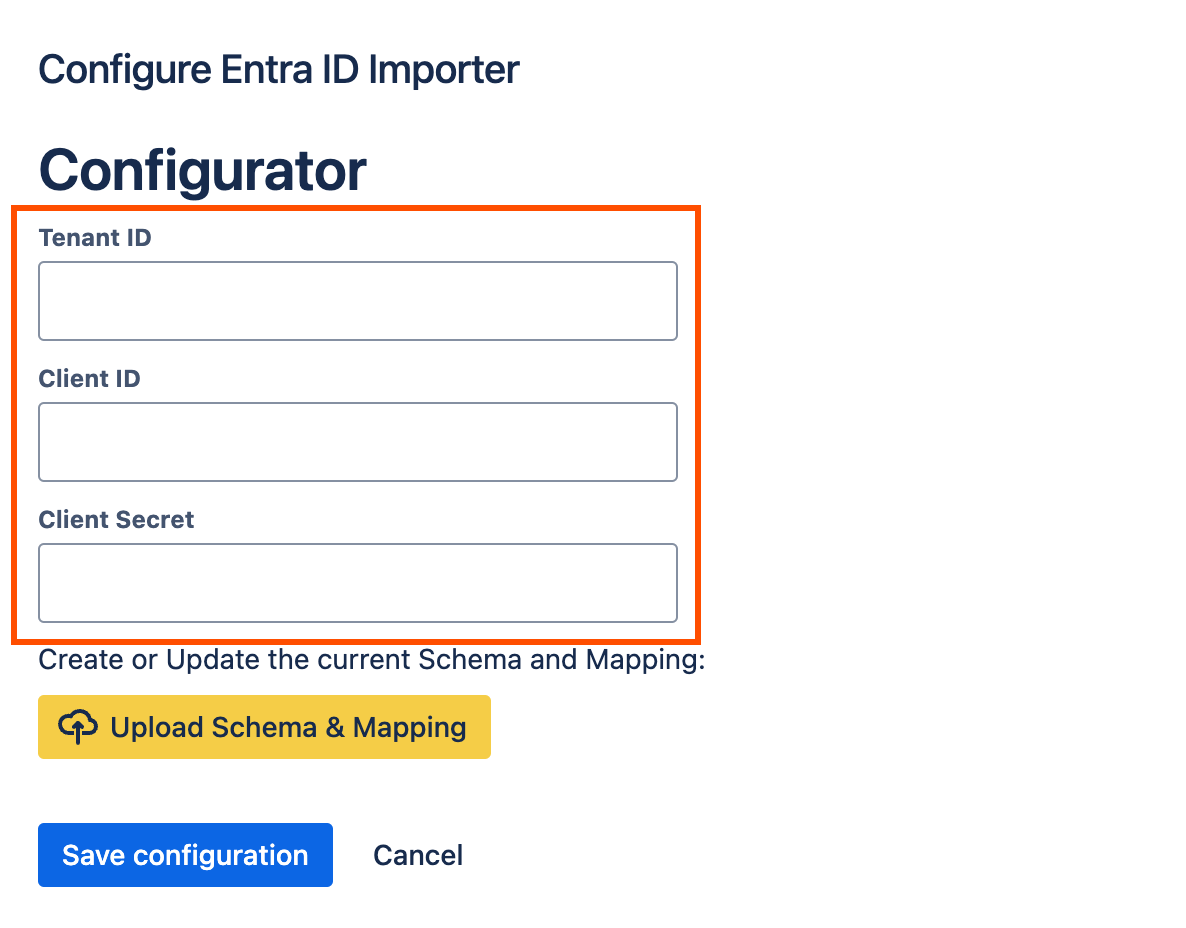
You'll then be presented with three fields labeled 'Tenant ID,' 'Client ID,' and 'Client Secret.' To fill these in, let's open a new tab and navigate to the Microsoft Entra Admin Center Page.
On the left side of the page, locate the 'Identity' dropdown menu. Expand it and then click on the 'Overview' option.

From the Overview page, you'll find your Tenant ID. Copy this value and paste it into the corresponding 'Tenant ID' field back in your Jira importer configuration.

Next, expand the 'Applications' section on the left side of the page and click on 'App registrations'. Once there, click the 'New registration' button to create a new app registration.

Enter a descriptive name for your application. Ensure that the option 'Accounts in this organizational directory only' is selected under 'Supported account types'.

Once you've filled in the required details, locate the 'Register' button in the bottom left corner of the page and click it.

You'll then be directed to the 'Overview' page of the App registration. Here, you'll find the 'Client ID' (also referred to as 'Application ID'). If you haven't already copied the 'Tenant ID' (or 'Directory ID') from the previous step, you can also locate it on this page.

Navigate to the 'Certificates & secrets' section. Click on the 'New client secret' button. Provide a descriptive name and choose an expiration date for the secret. Remember that you'll need to create a new client secret once the current one expires.

Once you click the 'Add' button, your new Client Secret will be displayed. Make sure to copy the 'Value' displayed and paste it into the 'Client Secret' field back in your Jira configuration.

The next step is to grant the necessary permissions to your app registration. Navigate to the 'API permissions' section and click on the 'Add a permission' button. From the list of available APIs, select 'Microsoft Graph'.

Make sure 'Application permissions' is selected. In the search bar, look for the following permissions:
User.Read.All
Group.Read.All
Device.Read.All
Check the box next to each permission, then click the 'Add permissions' button at the bottom.

To finalise the permission changes, you'll need to grant admin consent for your tenant. Locate and click the button labeled 'Grant admin consent for [Tenant Name]'. A pop-up will appear; confirm your action by clicking 'Yes'.

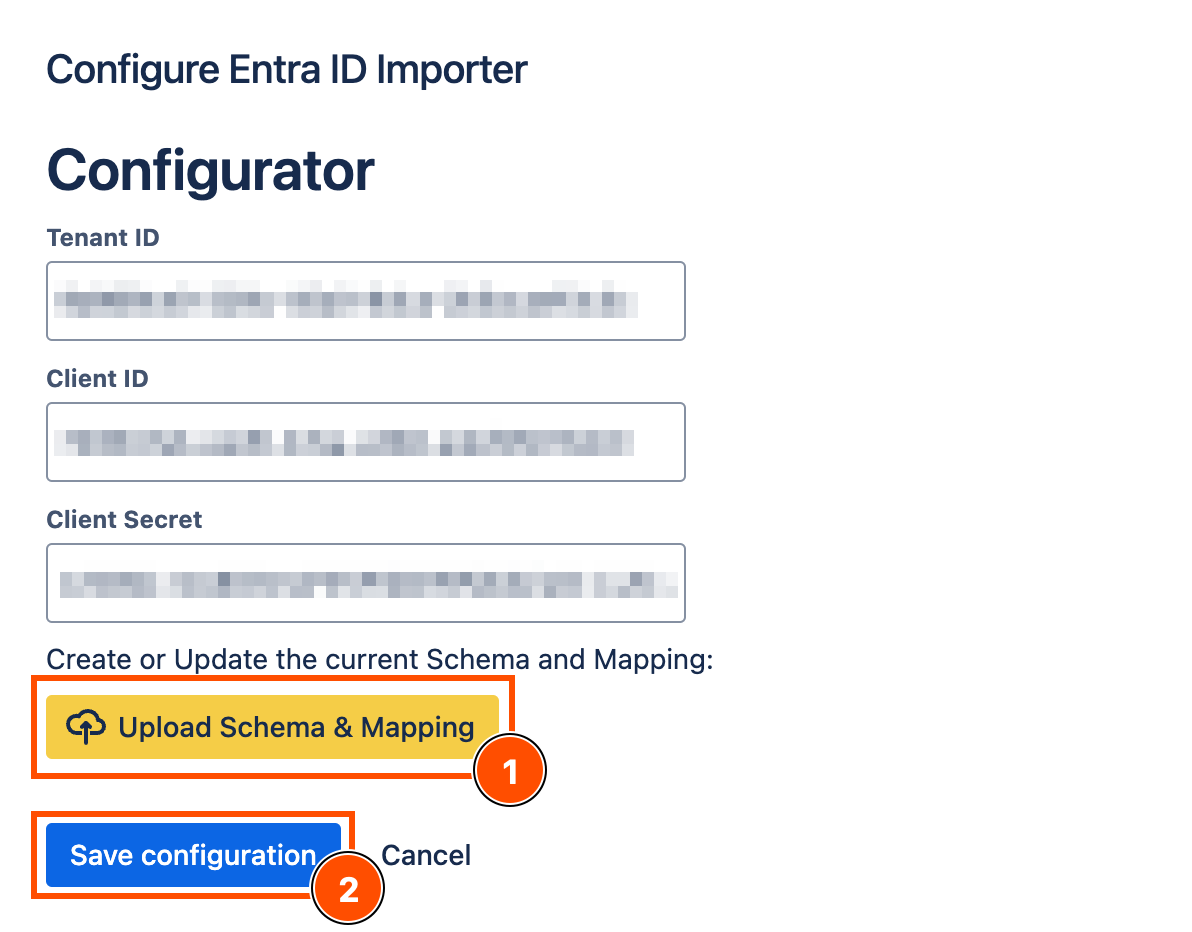
Now, return to the Jira configuration page. If you've entered all the details correctly, you should be able to click on 'Save configuration'. Once saved, proceed to click on 'Renew Token' and then 'Update Schema'.
Congratulations! You're all set up and ready to start importing your Entra ID assets into Jira.
Step 3: Use the Jira app
You're now ready to use the Jira app! Simply click on 'Import data' whenever you want to update your Jira Assets with the latest information from Entra ID.
Permission necessary: Jira Admin

Once the import is complete, you can review the changes, additions, and removals by clicking on the "Read details" link in the Import Menu.